Deployment Manual
| Document Version | Content Revision | Revised By | Revision Date |
|---|---|---|---|
| V1.0 | Basic content of the General Control Deployment Manual | Wang Yao, Wang Jiale | 2021-01-12 |
| V1.1 | Added user permission authentication, added startup notes | Wang Yao | 2021-01-21 |
| V1.2 | Added SSL certificate configuration method | Wang Yao | 2021-02-04 |
| V1.3 | Added First Login mode | Wang Yao | 2021-02-22 |
| V1.4 | Added ArangoDB installation and configuration instructions | Wang Yao | 2021-03-23 |
| V1.5 | Added ccs-web component deployment instructions | Wang Jiale | 2021-07-09 |
| V1.6 | Updated Zhongbiao Qilin deployment instructions | Wang Yao | 2021-08-08 |
| V1.7 | Updated operating system requirements | Wang Yao | 2022-10-16 |
| V1.8 | Added usage method for nedb database | Wang Yao | 2022-11-23 |
| V2.1.9 | Added service management | Wang Jiale | 2024-08-20 |
| V3.0.0 | Updated deployment method | Guochenghao | 2024-09-20 |
Hardware and Operating System Requirements
| Hardware Requirements | Recommended Specifications |
|---|---|
| Processor (CPU) | >= i5-10500, arm or x86-64 |
| Memory (RAM) | >= 16G |
| Disk (DISK) | >= 512G, SSD recommended |
| Operating System | Recommended Version |
|---|---|
| Windows | >= Win10 |
| MacOS | >= 12.1 |
| Ubuntu | >= 20.04 |
Obtain Software
Download link: Shanghai Sansi General Control
Through the above link, you can download various system versions of the Xuan Dao Intelligent Control software (cyberhub). Please download the software suitable for your target device and install it after extraction. It is designed to run on 64-bit general operating systems under x86 and arm architectures. If you require special versions for MIPS/LoongArch architectures or specific operating system adaptations, please contact the development team for assistance.

| Program Name | Architecture | Compatible Operating Systems |
|---|---|---|
| cyberhub_x.x.x_windows_x64.zip | x64 | Windows 10 and above |
| cyberhub_x.x.x_windows_arm64.zip | arm64 | Windows 10 and above |
| cyberhub_x.x.x_mac_x64.zip | x64 | MacOS (Intel version) |
| cyberhub_x.x.x_mac_arm64.zip | arm64 | MacOS (M1, M2 version) |
| cyberhub_x.x.x_linux_x64.deb | x64 | Ubuntu, CentOS, Zhongbiao Qilin, UOS, etc. |
| cyberhub_x.x.x_linux_arm64.deb | arm64 | Ubuntu, CentOS, Zhongbiao Qilin, UOS, etc. |
Installation and Startup
Windows
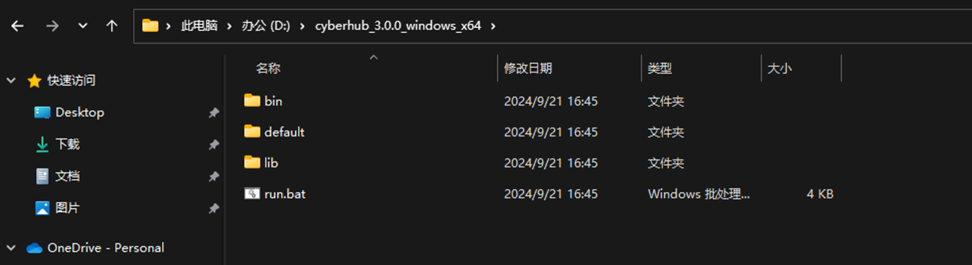
Download the cyberhub_x.x.x_windows_[arch].zip package and extract it. After extraction, you will see the following content. Run run.bat.
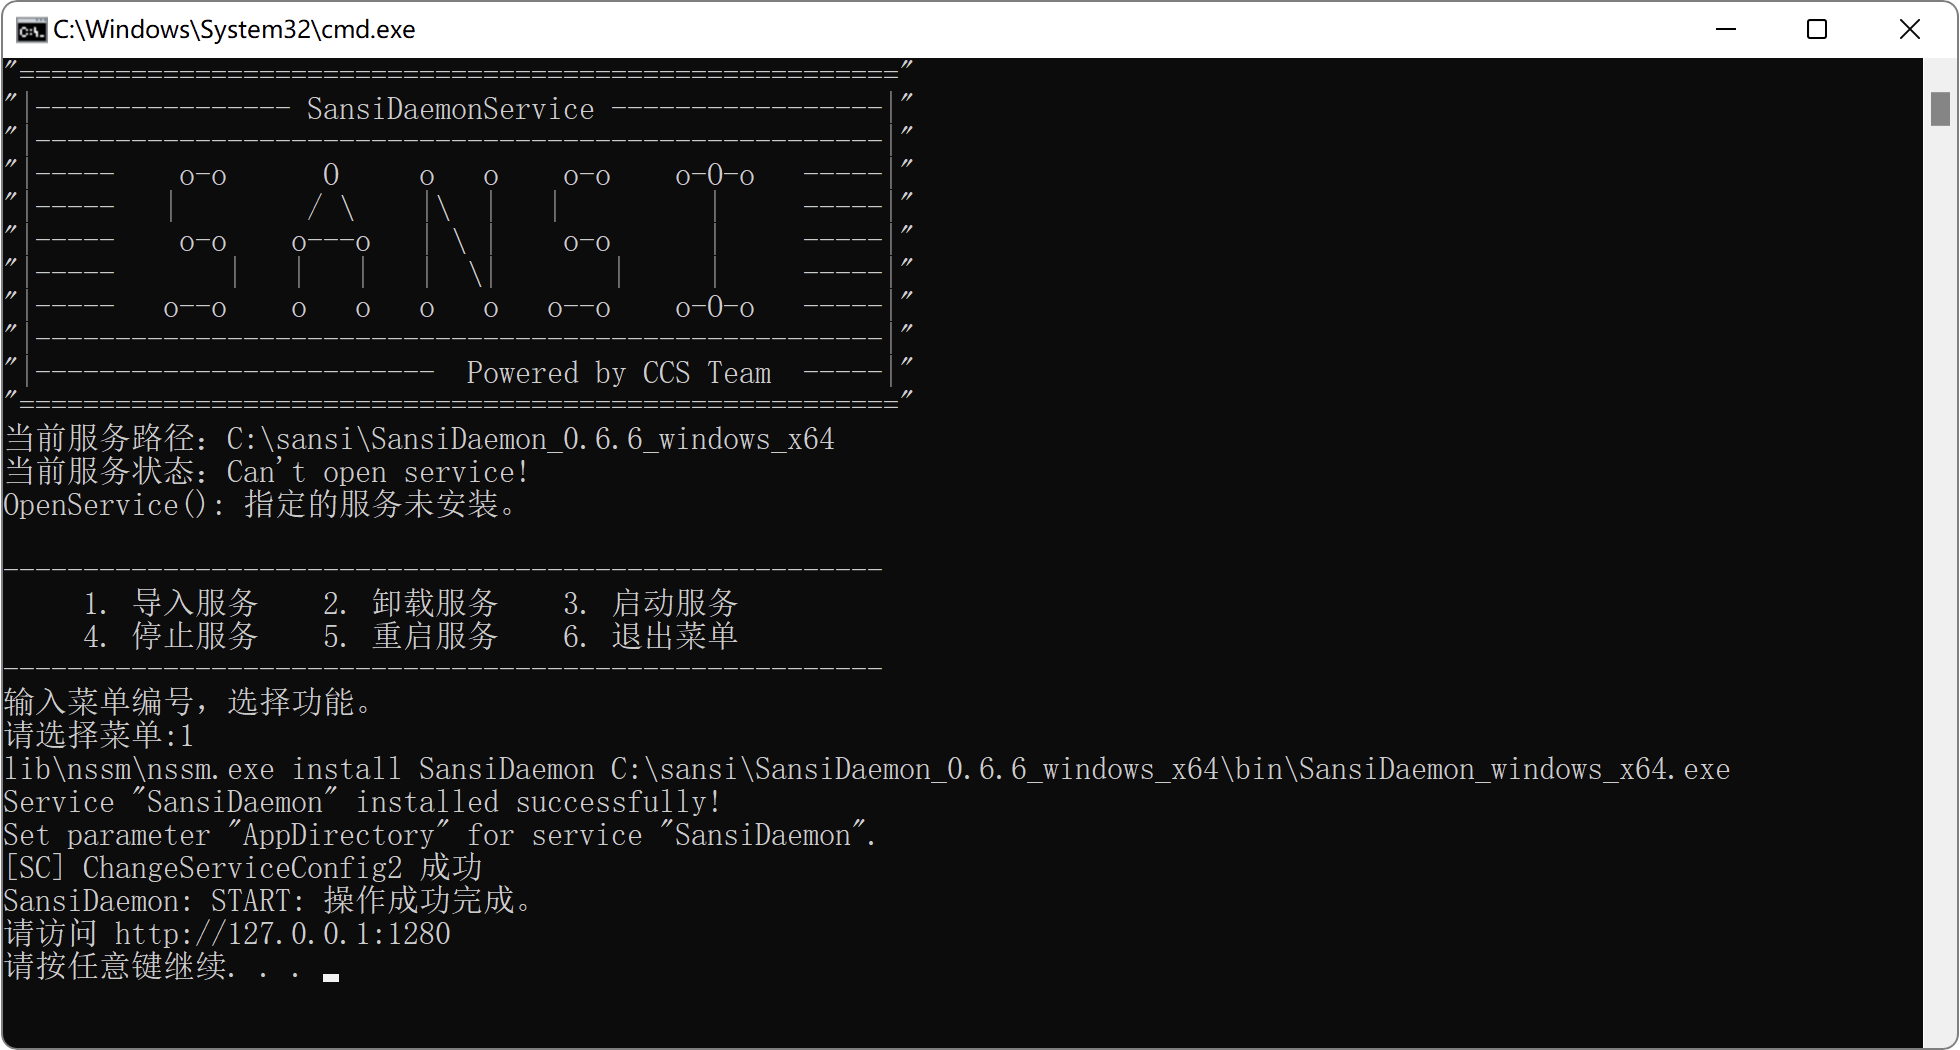
Use the keyboard to input the number 1 and press Enter to import the service. Wait for the execution to finish, then press Enter again.
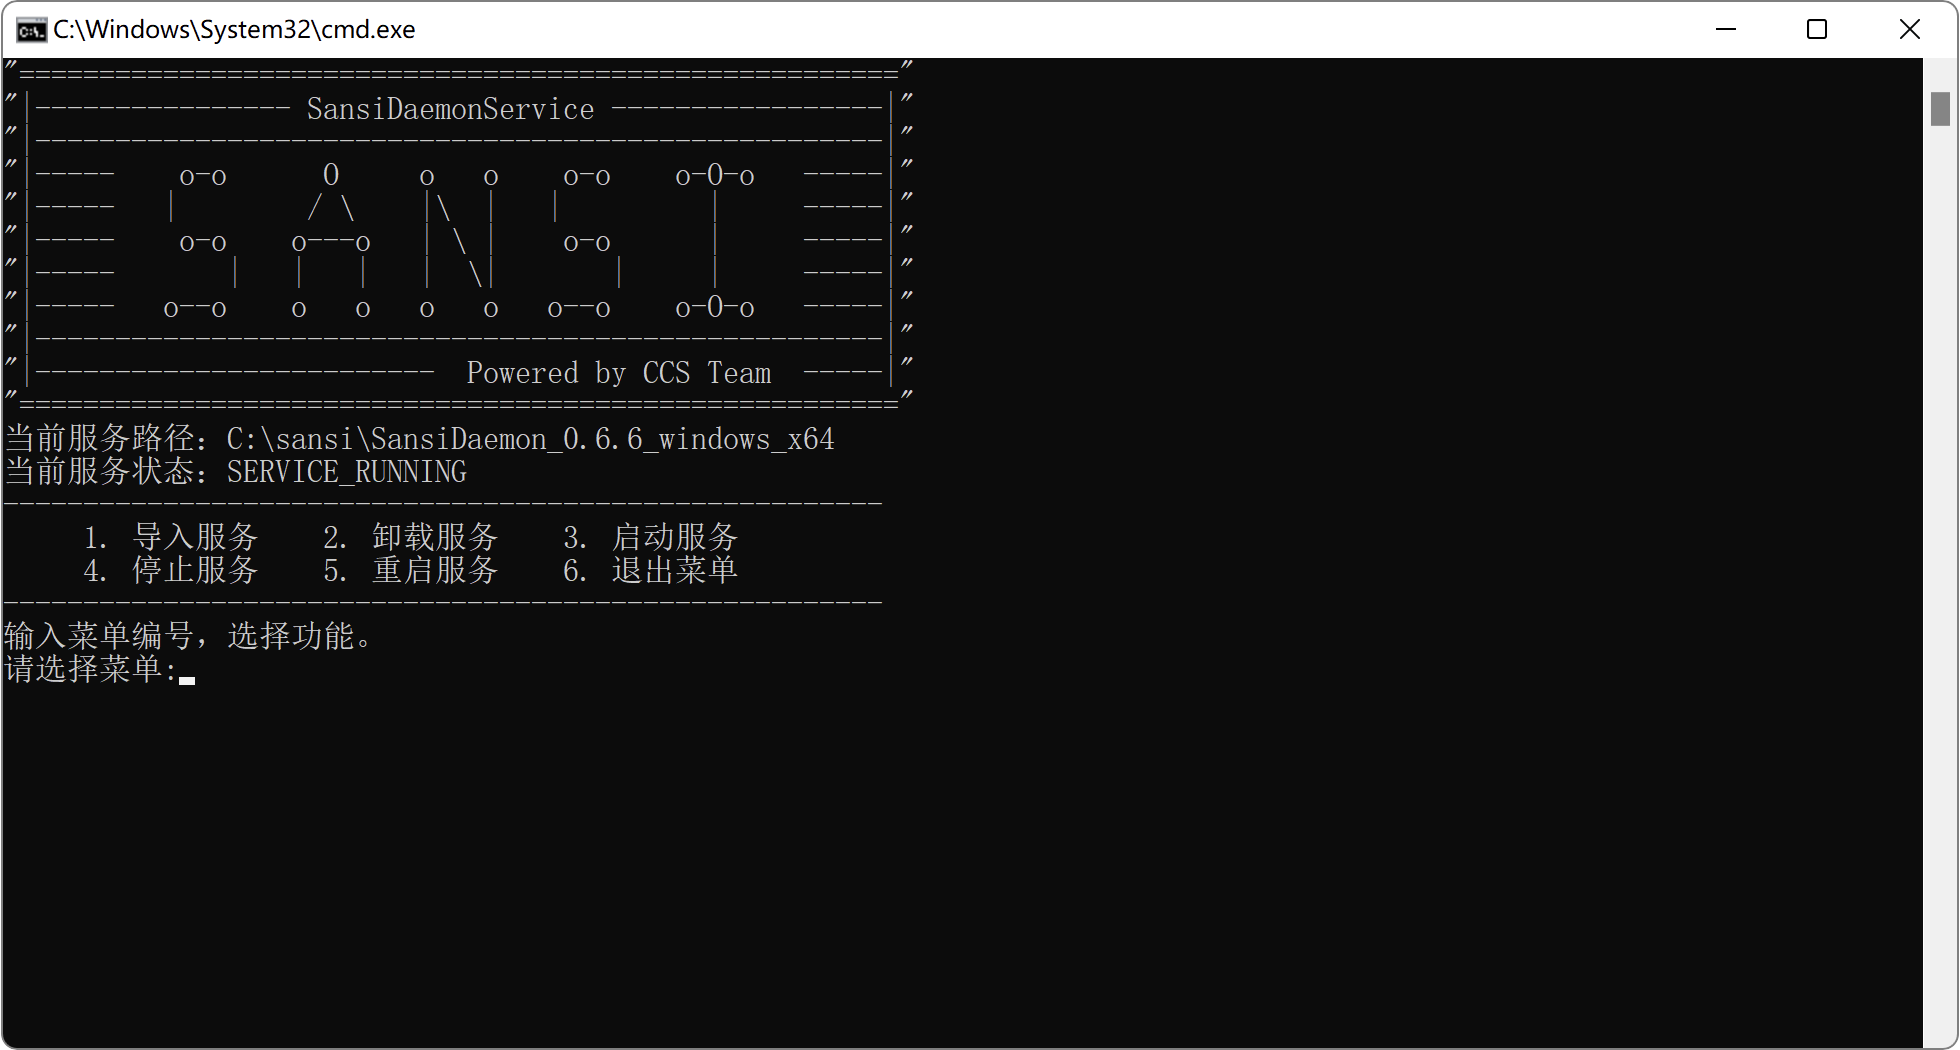
When you see Current Service Status: SERVICE_RUNNING, it indicates that the service was installed successfully. At this point, close the terminal.
Use the new version of Edge or Chrome browser to access http://127.0.0.1:1280 to enter the operation page.
⚠️Note: After version 0.9.4, HTTPS is enabled by default. The access address is https://127.0.0.1:12443.

Linux
Taking Ubuntu as an example,
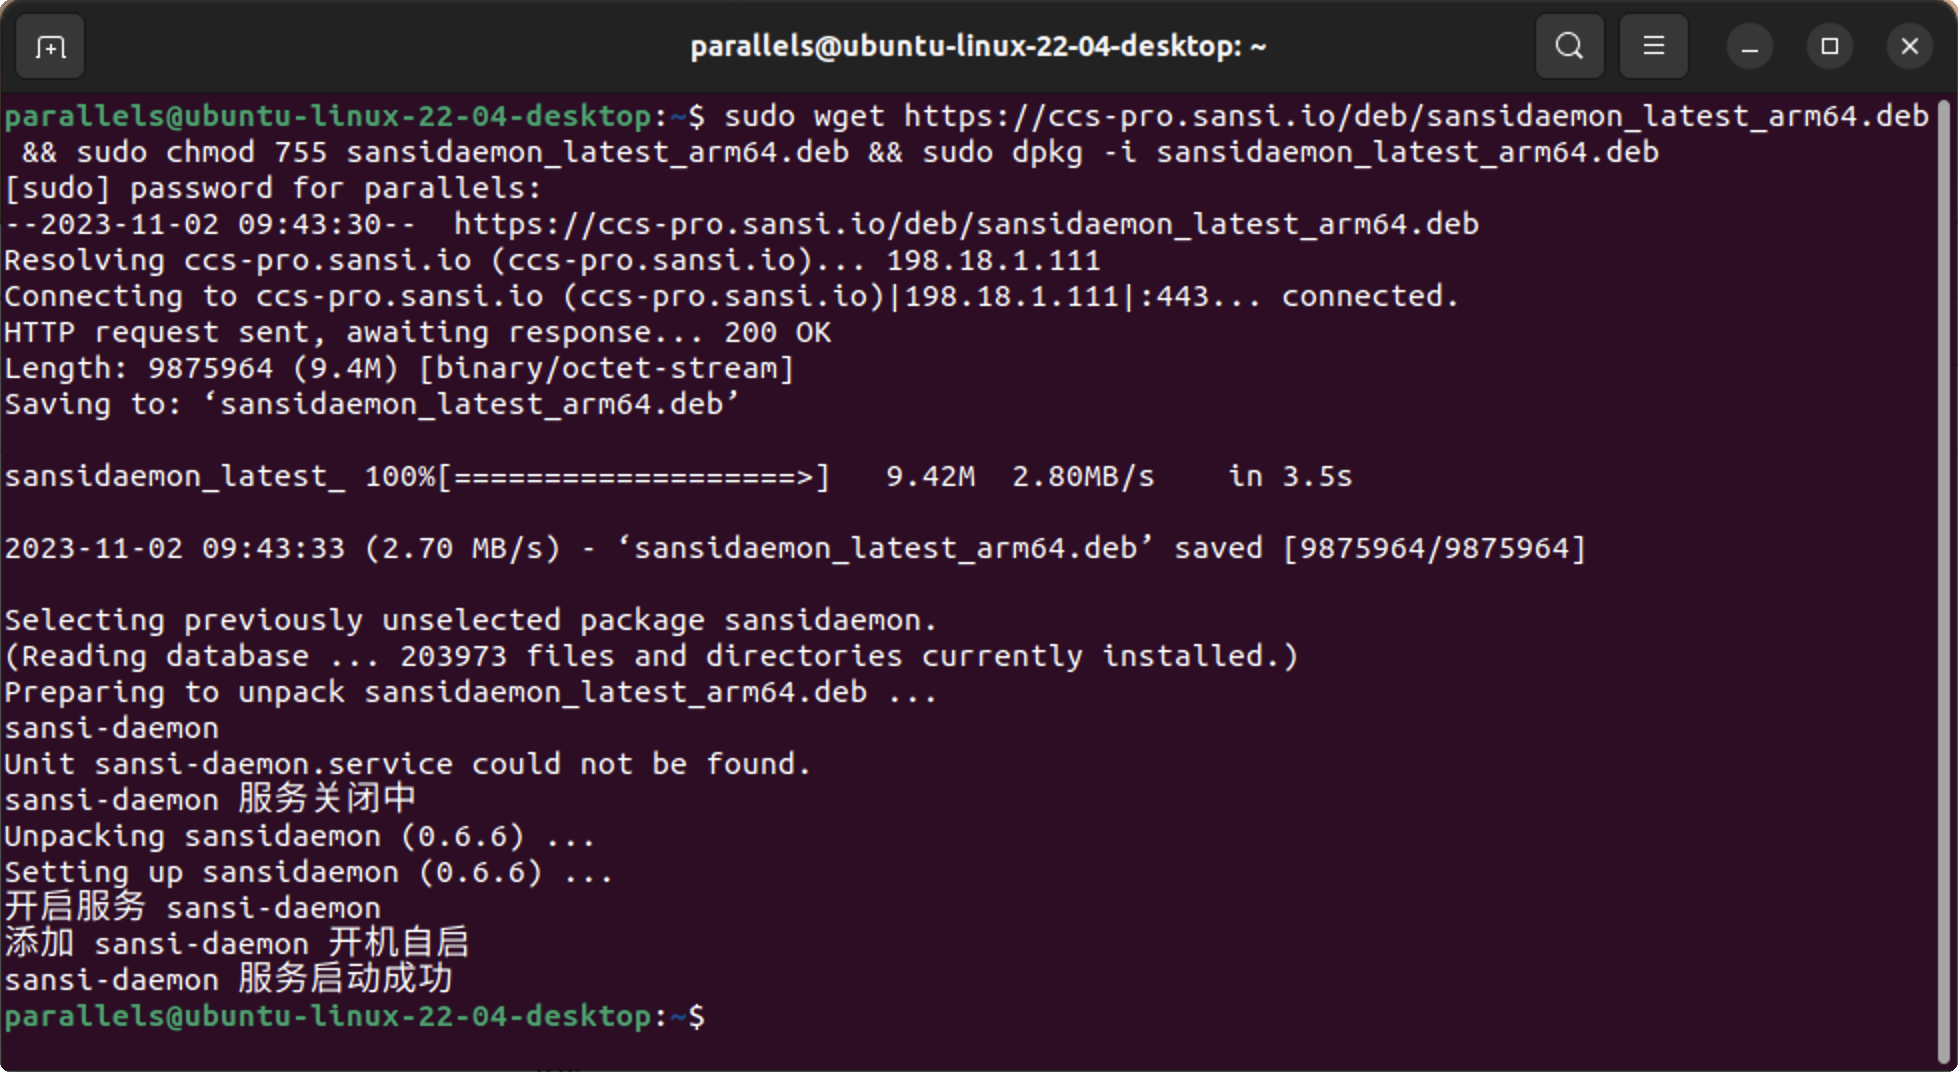
To obtain the software while connected to the internet:
sudo wget https://ccs-pro.sansi.io/deb/cyberhub_3.0.0_latest_arm64.debTo obtain the software without internet:
Download the corresponding platform's deb installation package from the Xuan Dao Intelligent Control Platform. Transfer the deb installation package to the Linux server where installation is needed via USB drive, scp, sftp, CD, etc. Execute the installation command:
sudo chmod 755 cyberhub_3.0.0_linux_arm64.deb # Change permissions (make sure to modify the file name to the actual name).
sudo dpkg -i cyberhub_3.0.0_linux_arm64.deb # Install the program.
After executing the above commands, you will see:
Upgrade
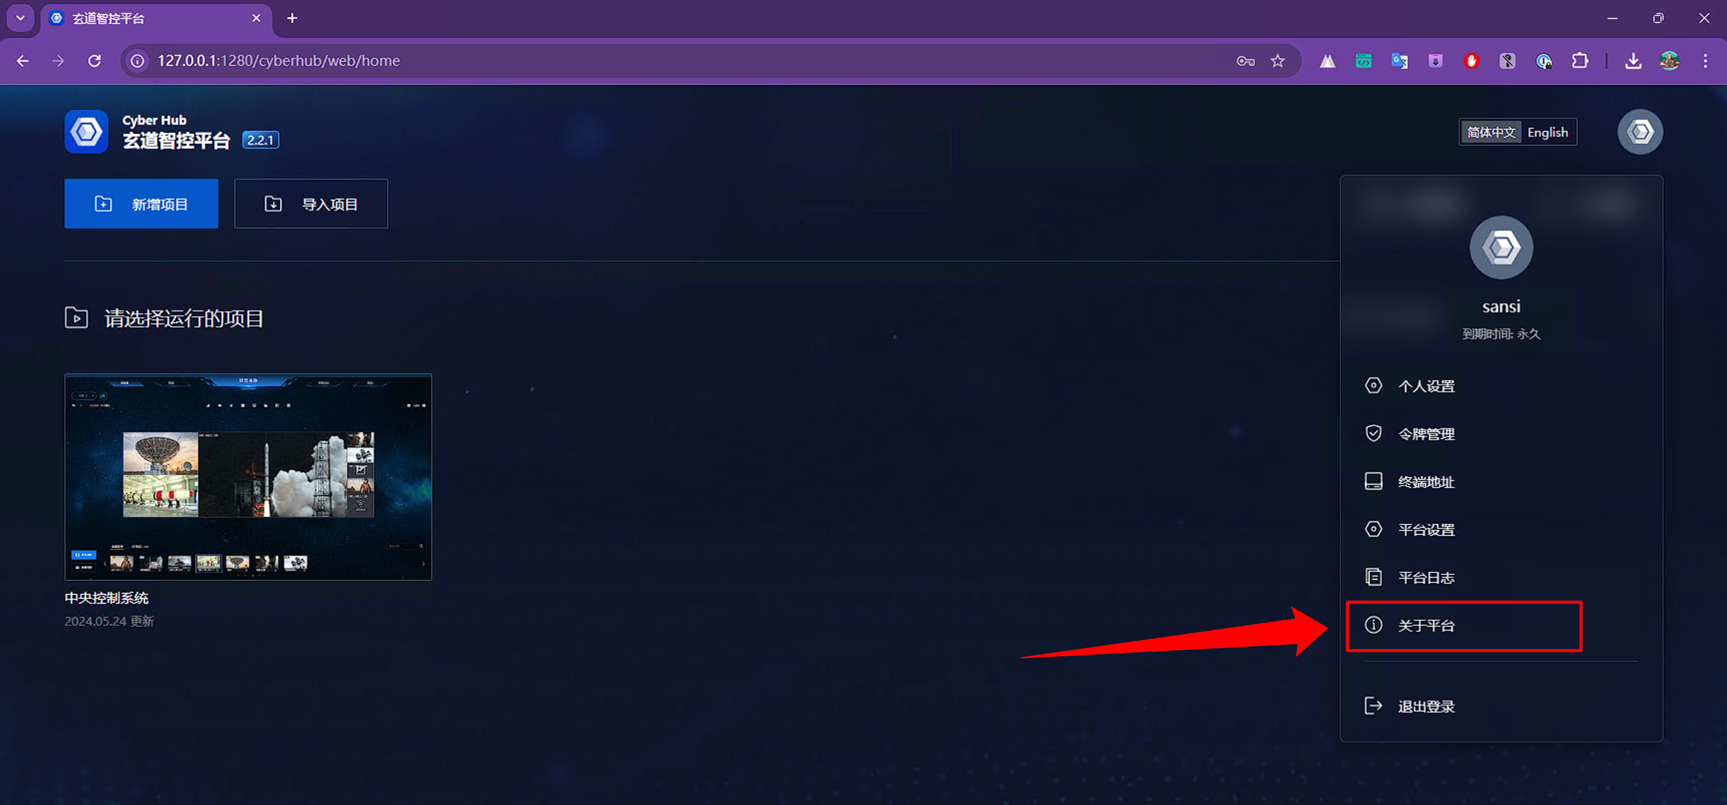
Click on the user avatar to enter the 【About Platform】 page.
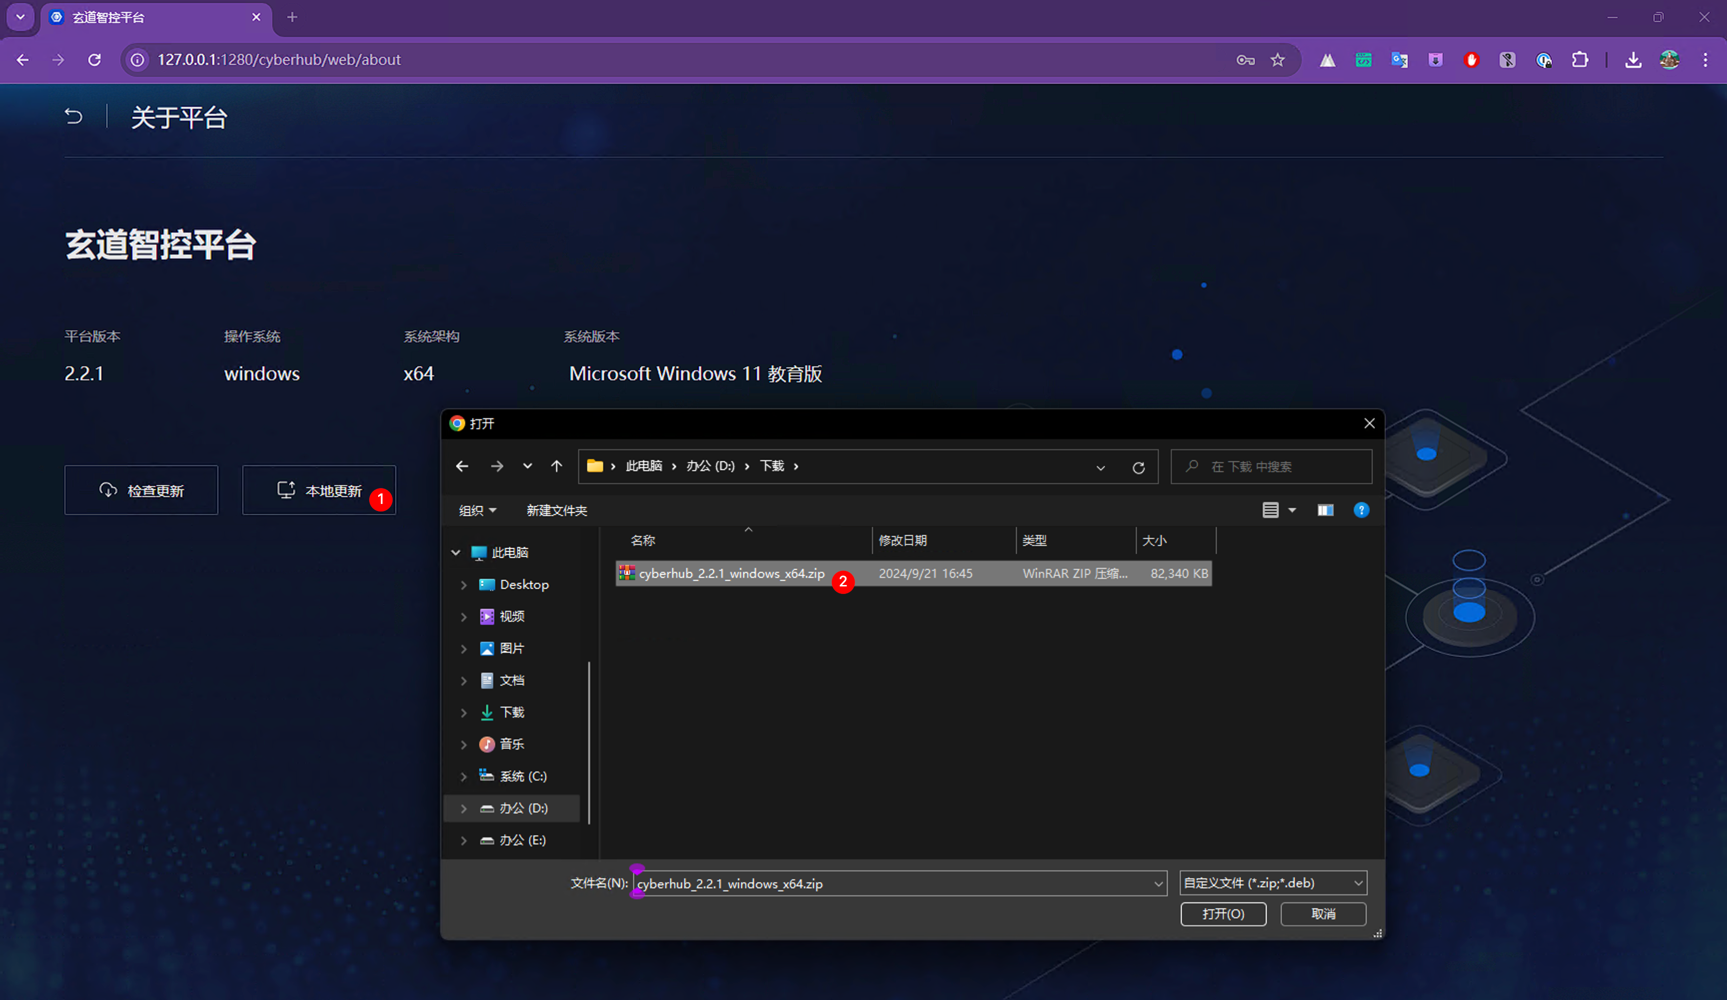
Click the 【Check for Updates】 or 【Local Update】 button.
Check for updates will perform an online upgrade.
Local update will upload the software package for upgrading.
In the pop-up file selection box, choose the installation package for the corresponding platform; select zip for Windows, and deb for Linux.
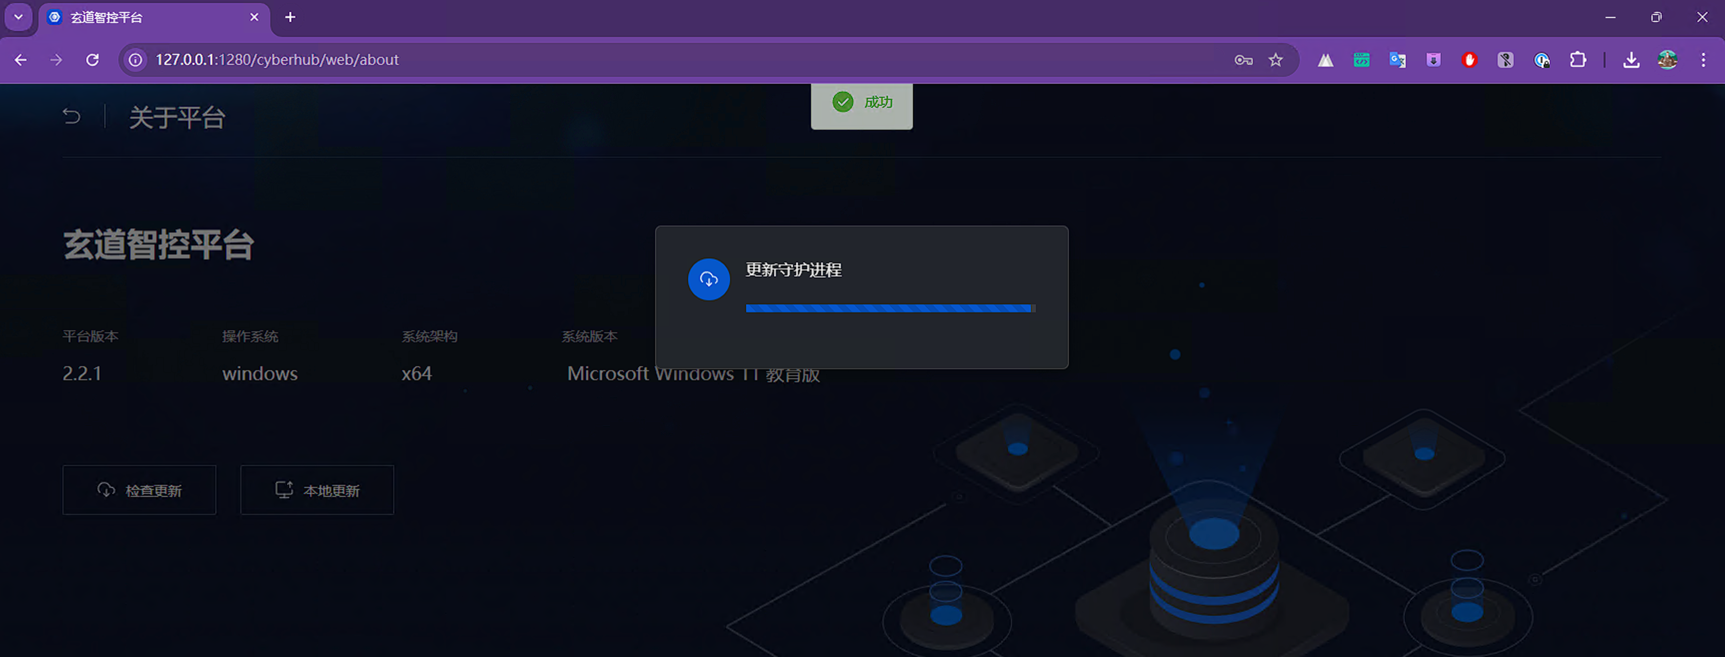
After that, you will see the upload progress. Once the upload is complete, wait for the service to restart automatically. Restarting may take some time, and you need to refresh the page afterwards.
Uninstall
Windows
Find the installation directory and double-click run.bat to run it.
Linux
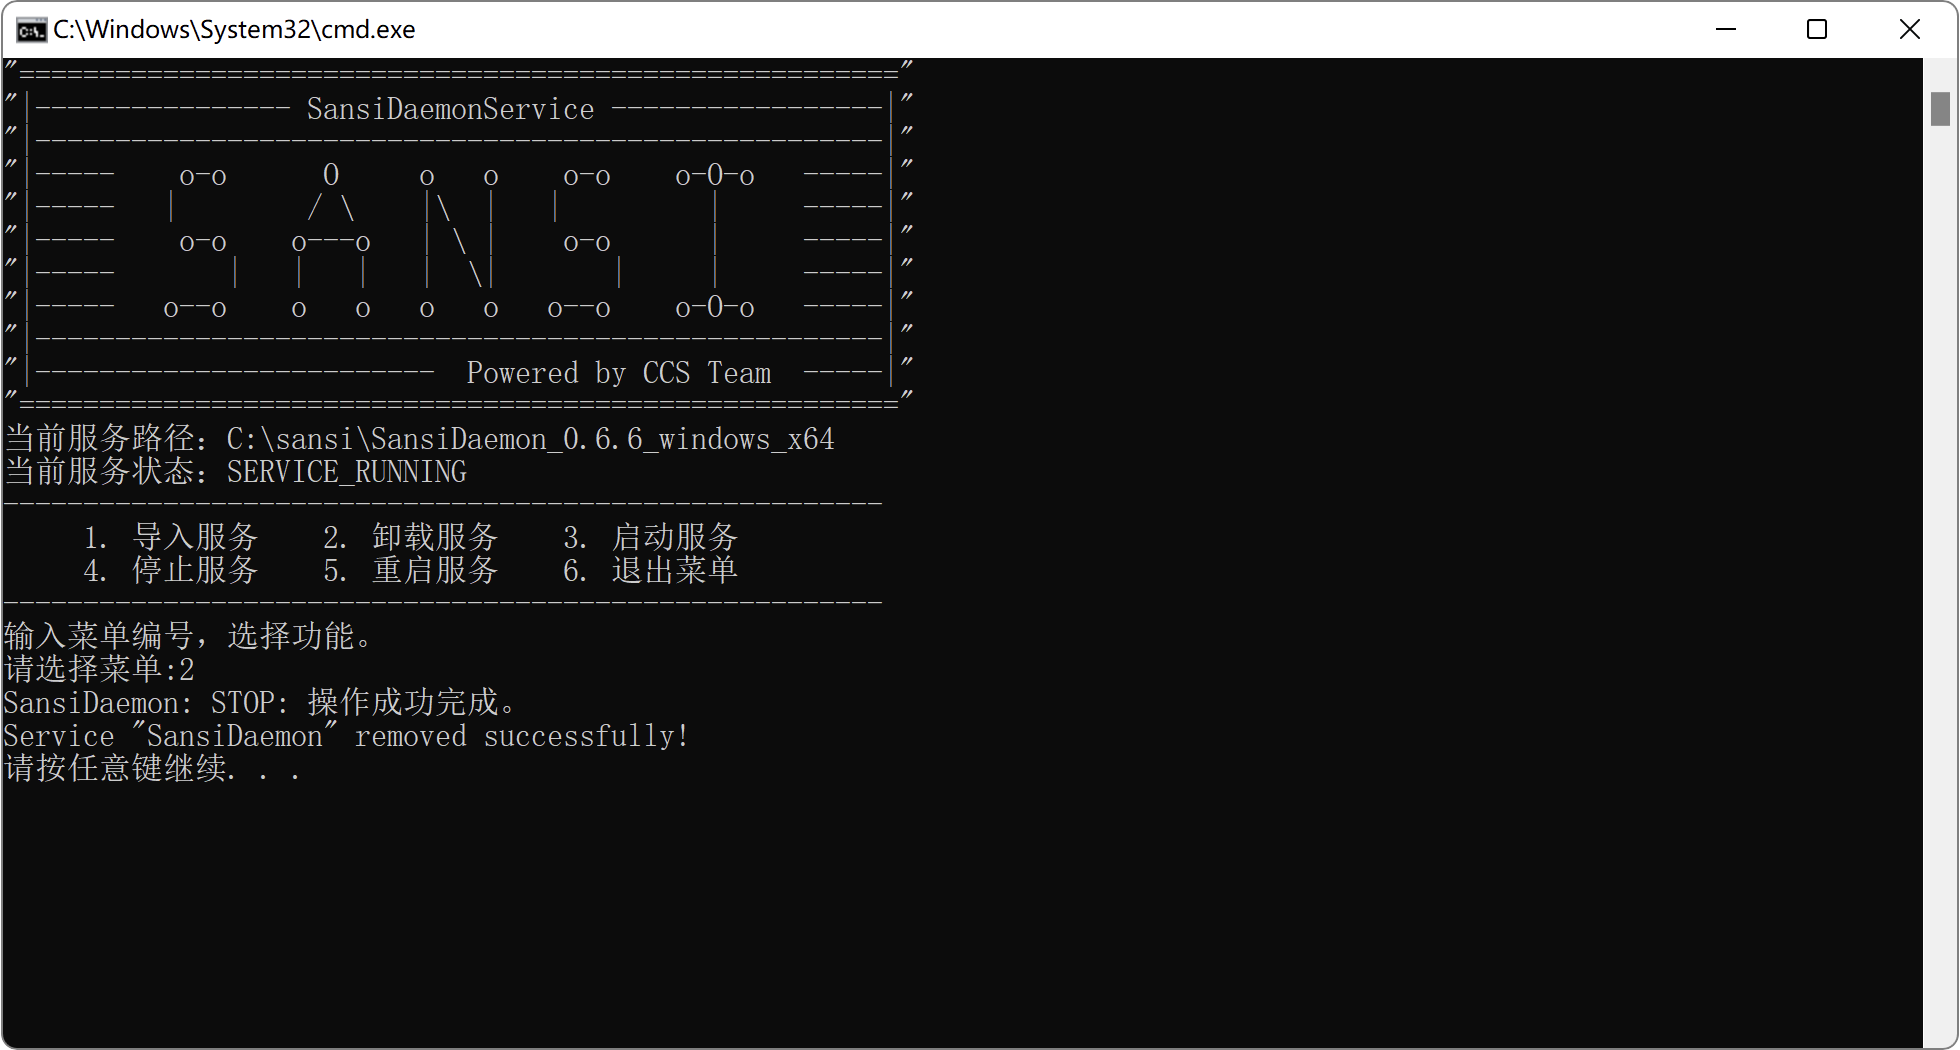
Open the terminal and enter the following command to uninstall the corresponding program.
sansiExecute Uninstall
Input the number 2 and press Enter; follow the prompts to complete the uninstallation.
Software Activation
Online Activation
Offline Activation
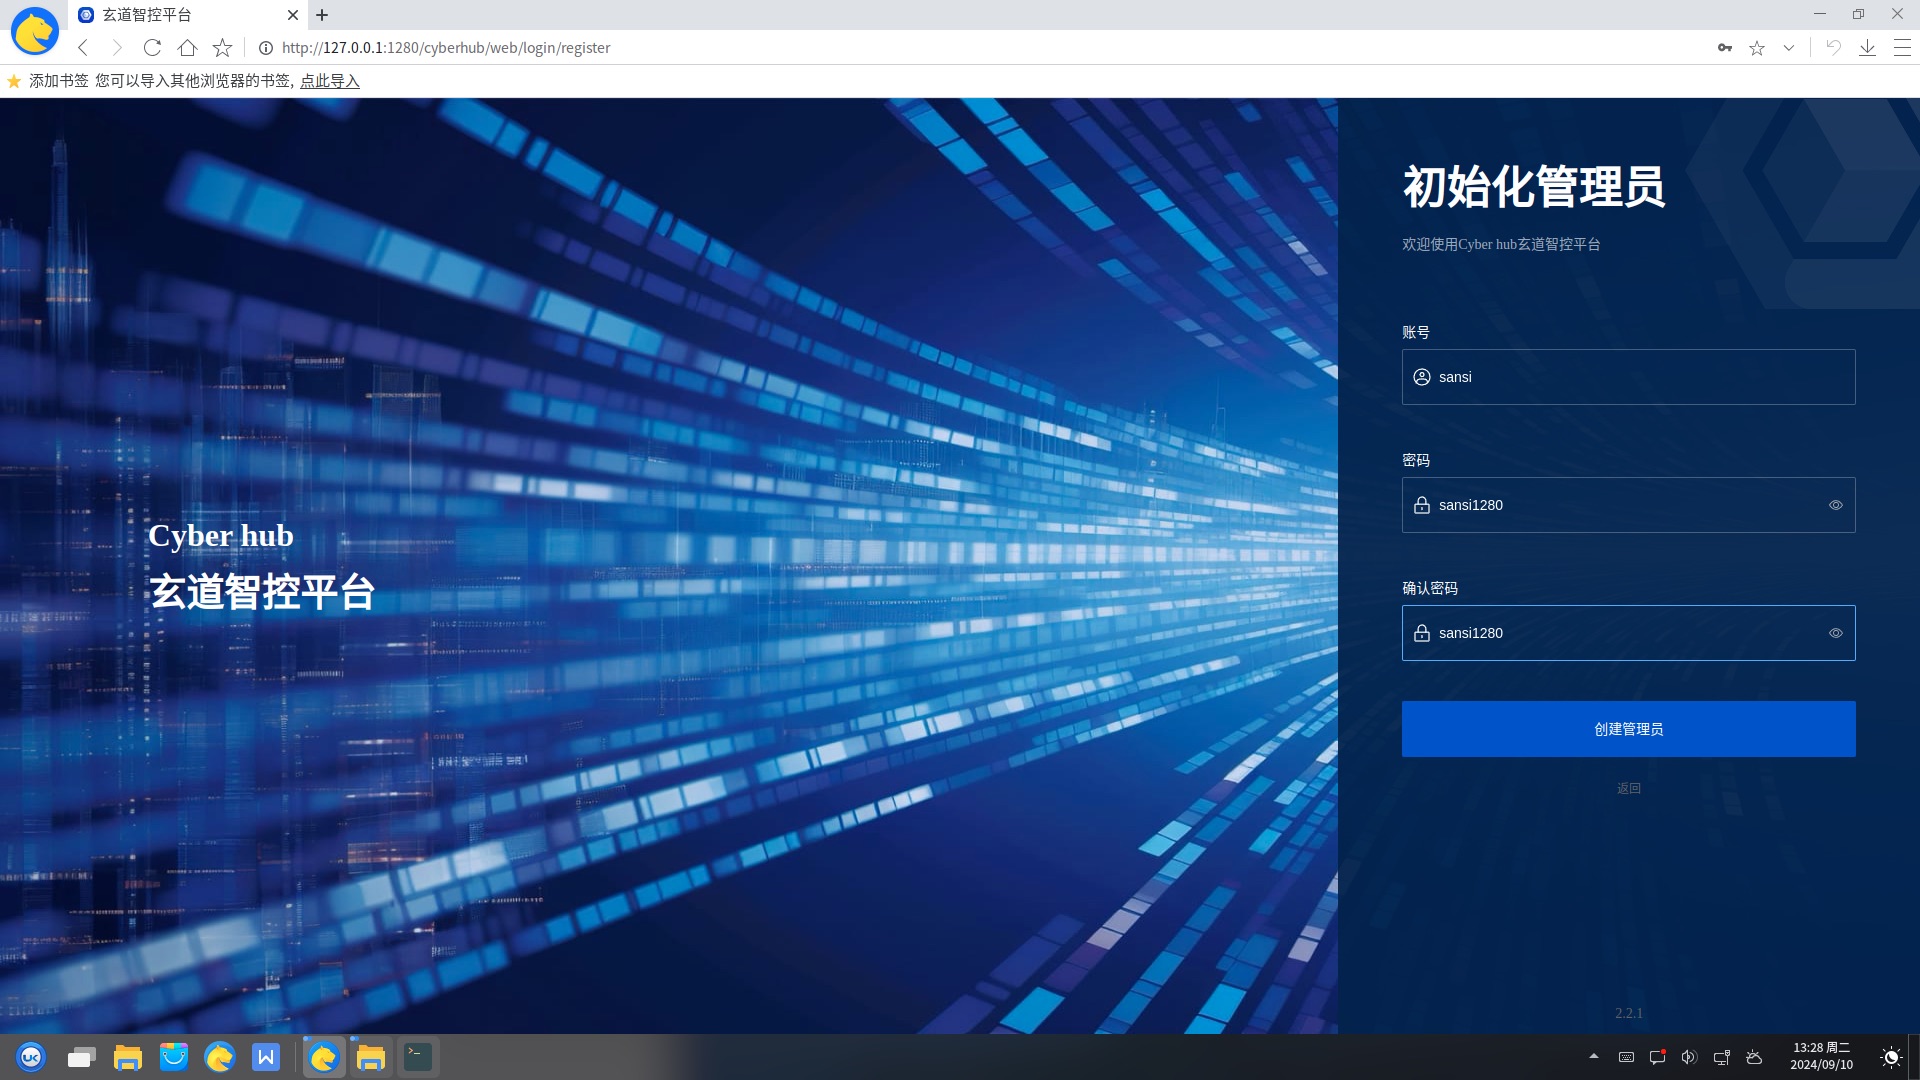
onfigure Administrator
When using the default configuration, after the software starts, enter http://127.0.0.1:1280 in the browser to open the software. If modifications are required, you can open the corresponding address in the browser as per the console output information.
Upon first starting the software, it will automatically enter the initialization administrator page to create a system administrator. The system administrator account password must not be disclosed to anyone.
Entering the Software
After creating the system administrator, you will automatically be redirected to the login page. Upon successful login, you will enter the main page.
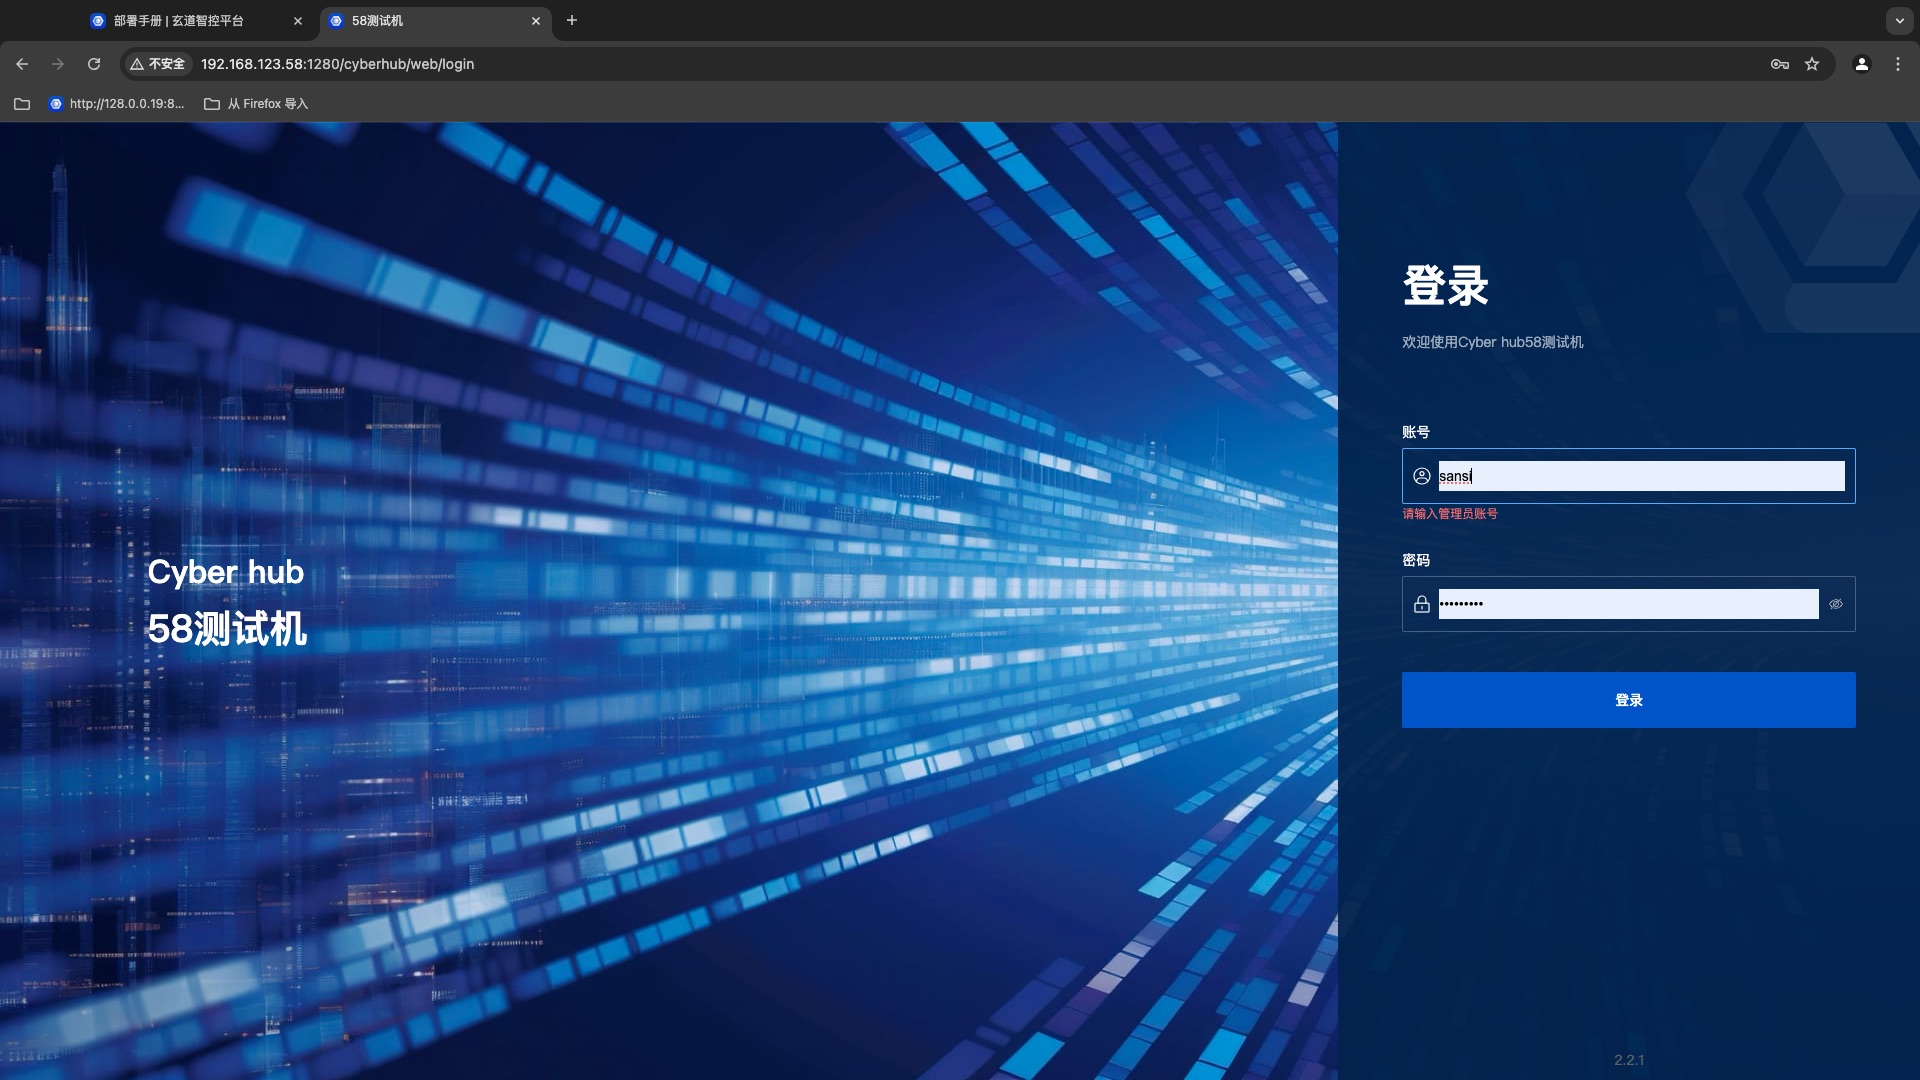
Note: Enter the account password of the configured administrator to access the project.
Main Page Introduction
After entering the main page, the displayed page is as follows. Hover your mouse over a project on the project homepage to edit the project.
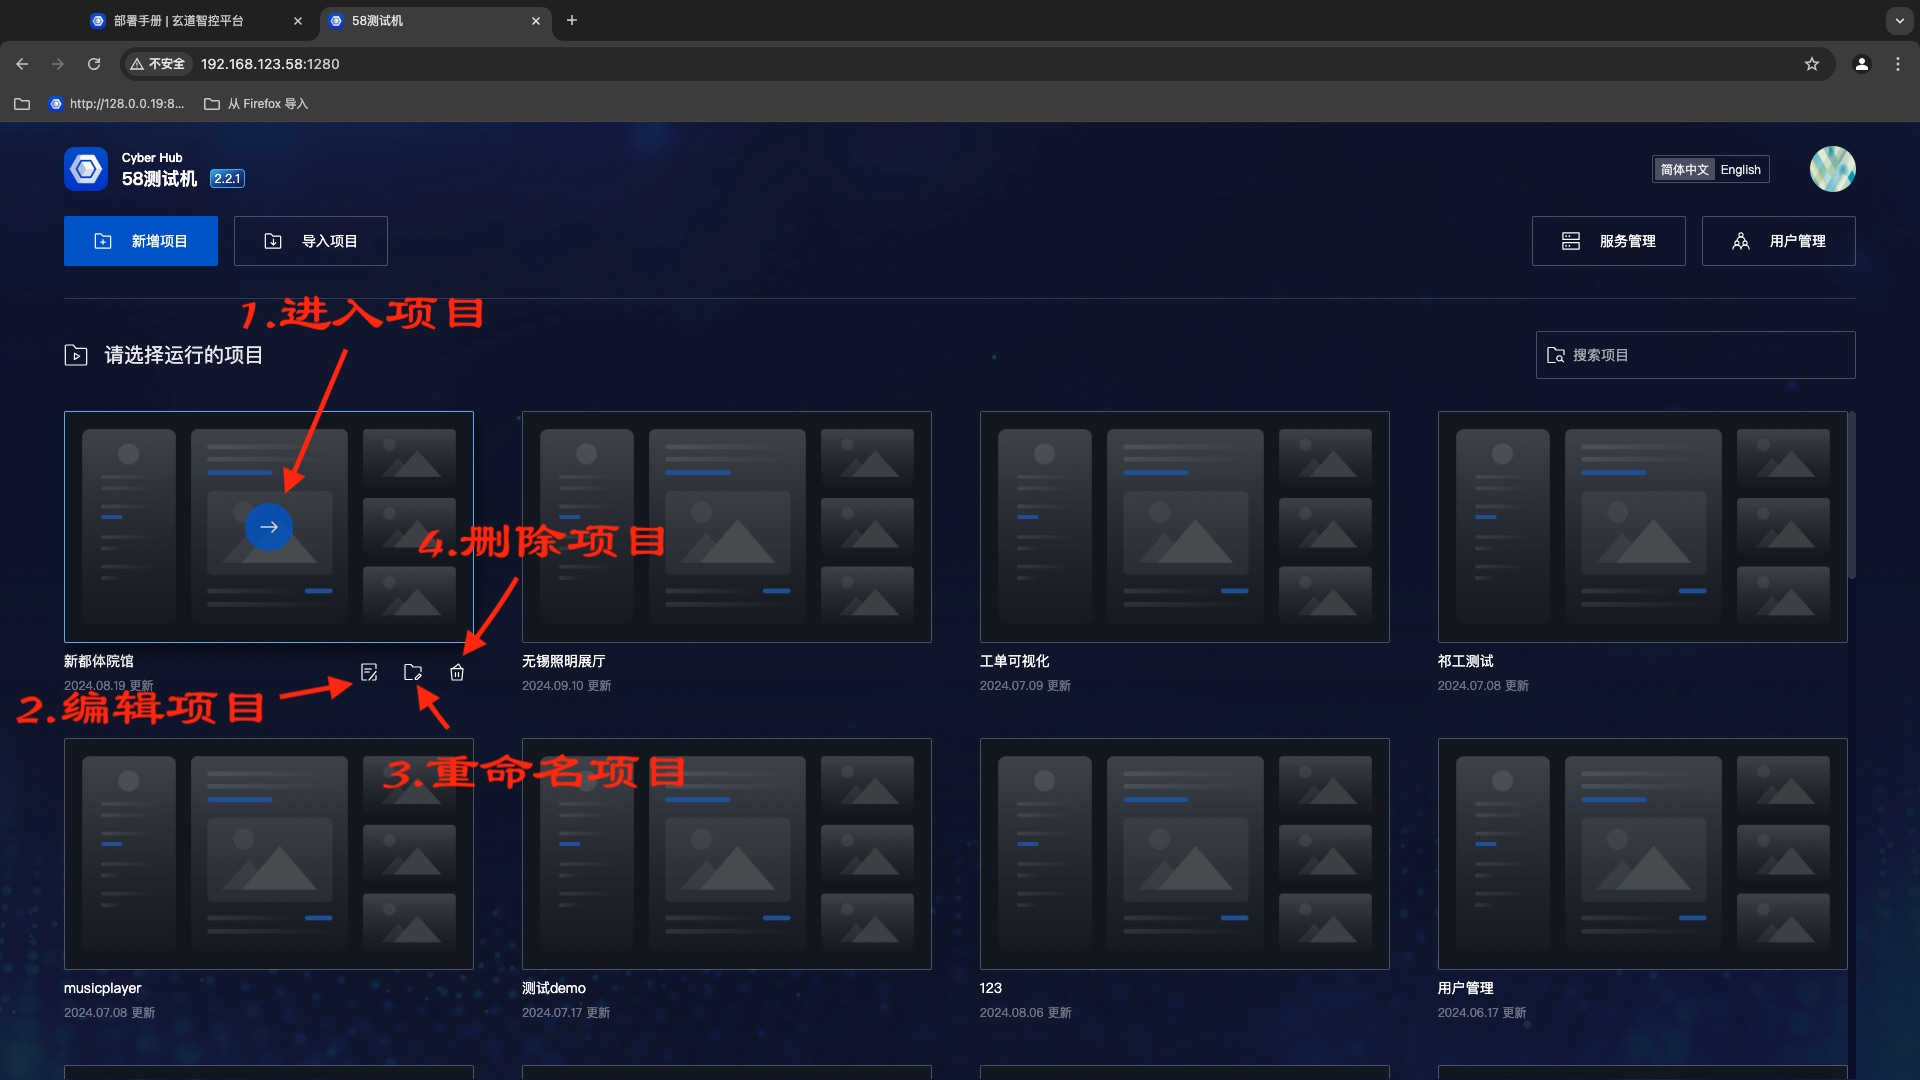
- Enter Project: Run the edited project.
- Edit Project: Edit project layout events, etc. The usage tutorial for the project editor is beyond the scope of this document. For learning how to use the page editor, please refer to the Editor User Manual.
- Rename Project: Name, project preview image.
- Delete Project.
- Service Management: Maintain all software used on-site, start, stop, restart, monitor service status, add service request agents, modify service configurations.
- User Management: Create users, modify user information, change user roles, reset passwords, disable users.
If you already have a project data package (ProjectName_v1.0.0_202101010808.sccs), click on the import project option in the upper left corner and select the data package to import. If there is no data package, you need to click on create a new project to create a new one.
Data Directory
After the application starts, related files will be generated in the user directory as follows:
In a Windows system, this folder path may be: C:\sansitech\cyberhub.
In a Linux system, this folder path may be: /opt/sansitech/cyberhub.
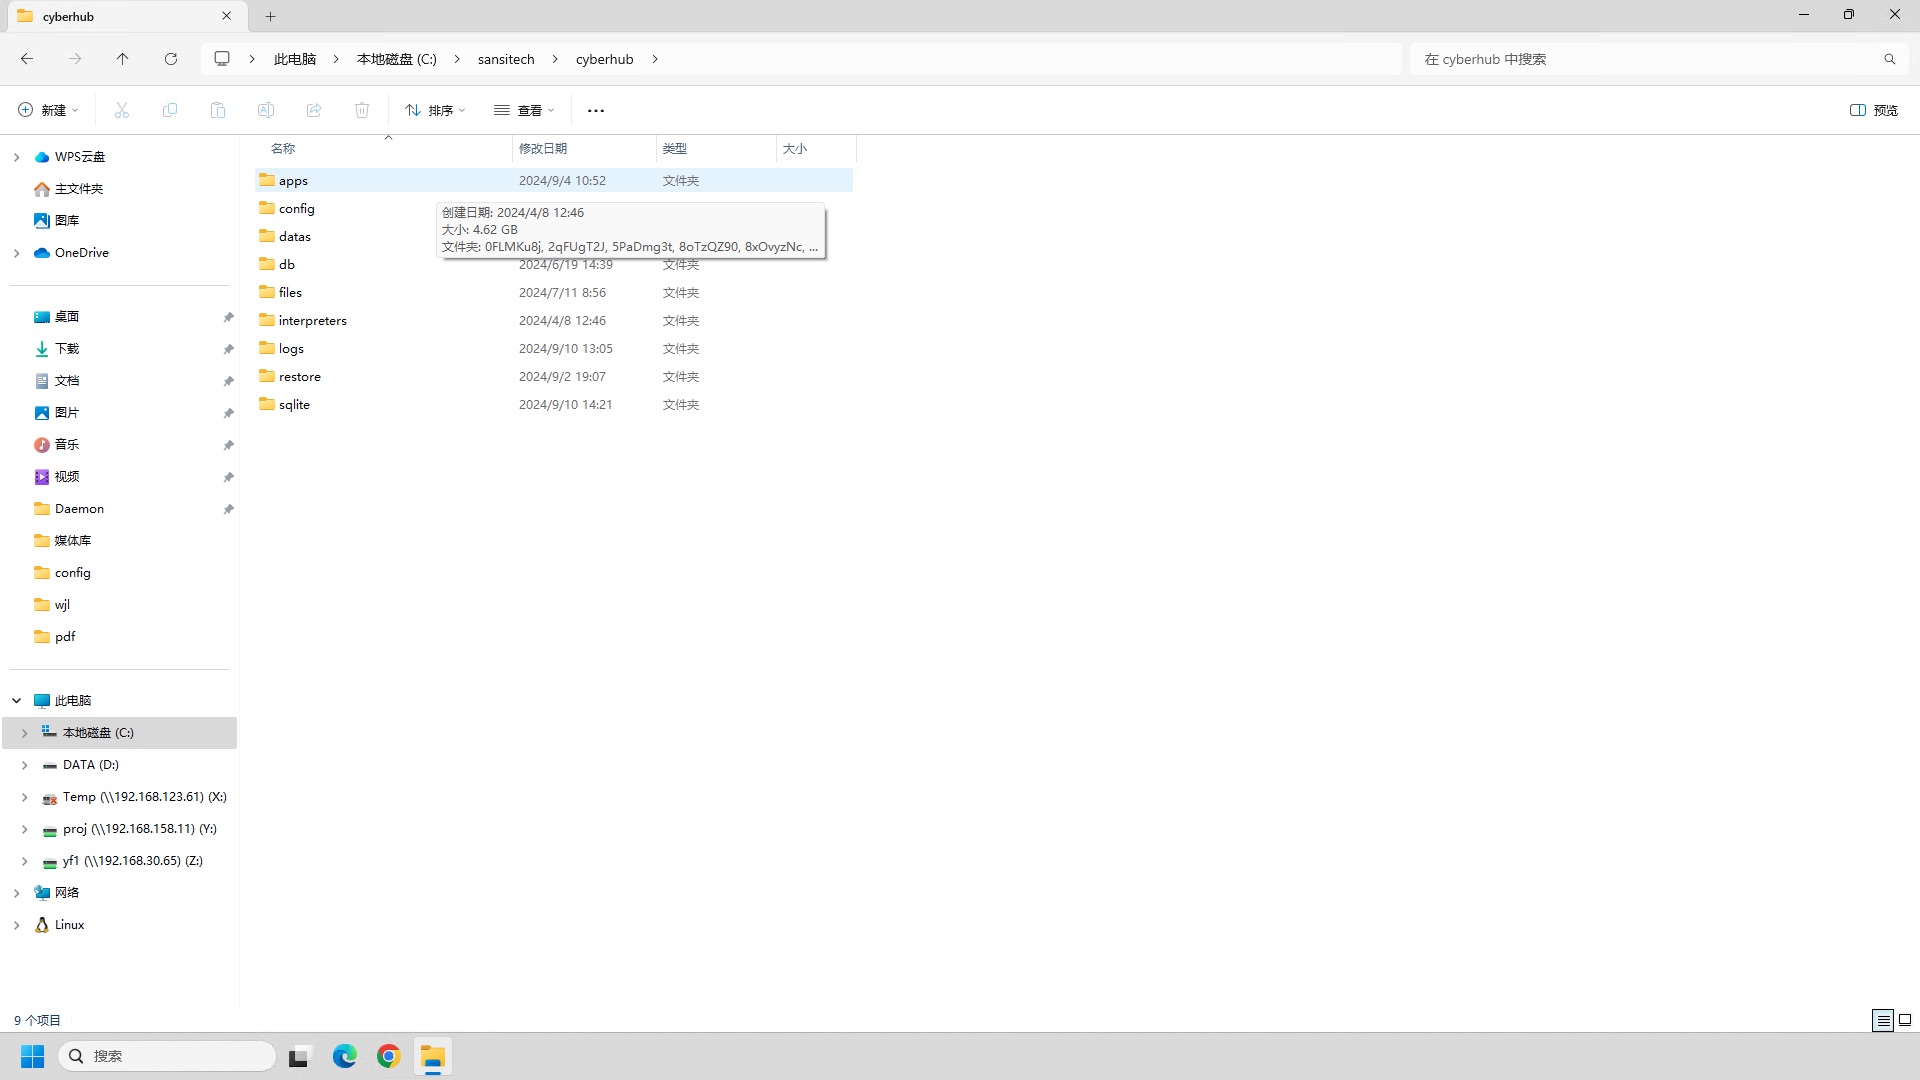
- If you need to adjust the application startup port later, please modify the
config/cyberhub.jsonon file in this directory. - If there are unresolved faults in the on-site program, please compress and package the
logsdirectory and send it to the development team for analysis of the fault cause. - The app directory contains server-downloaded program data.
Data Backup
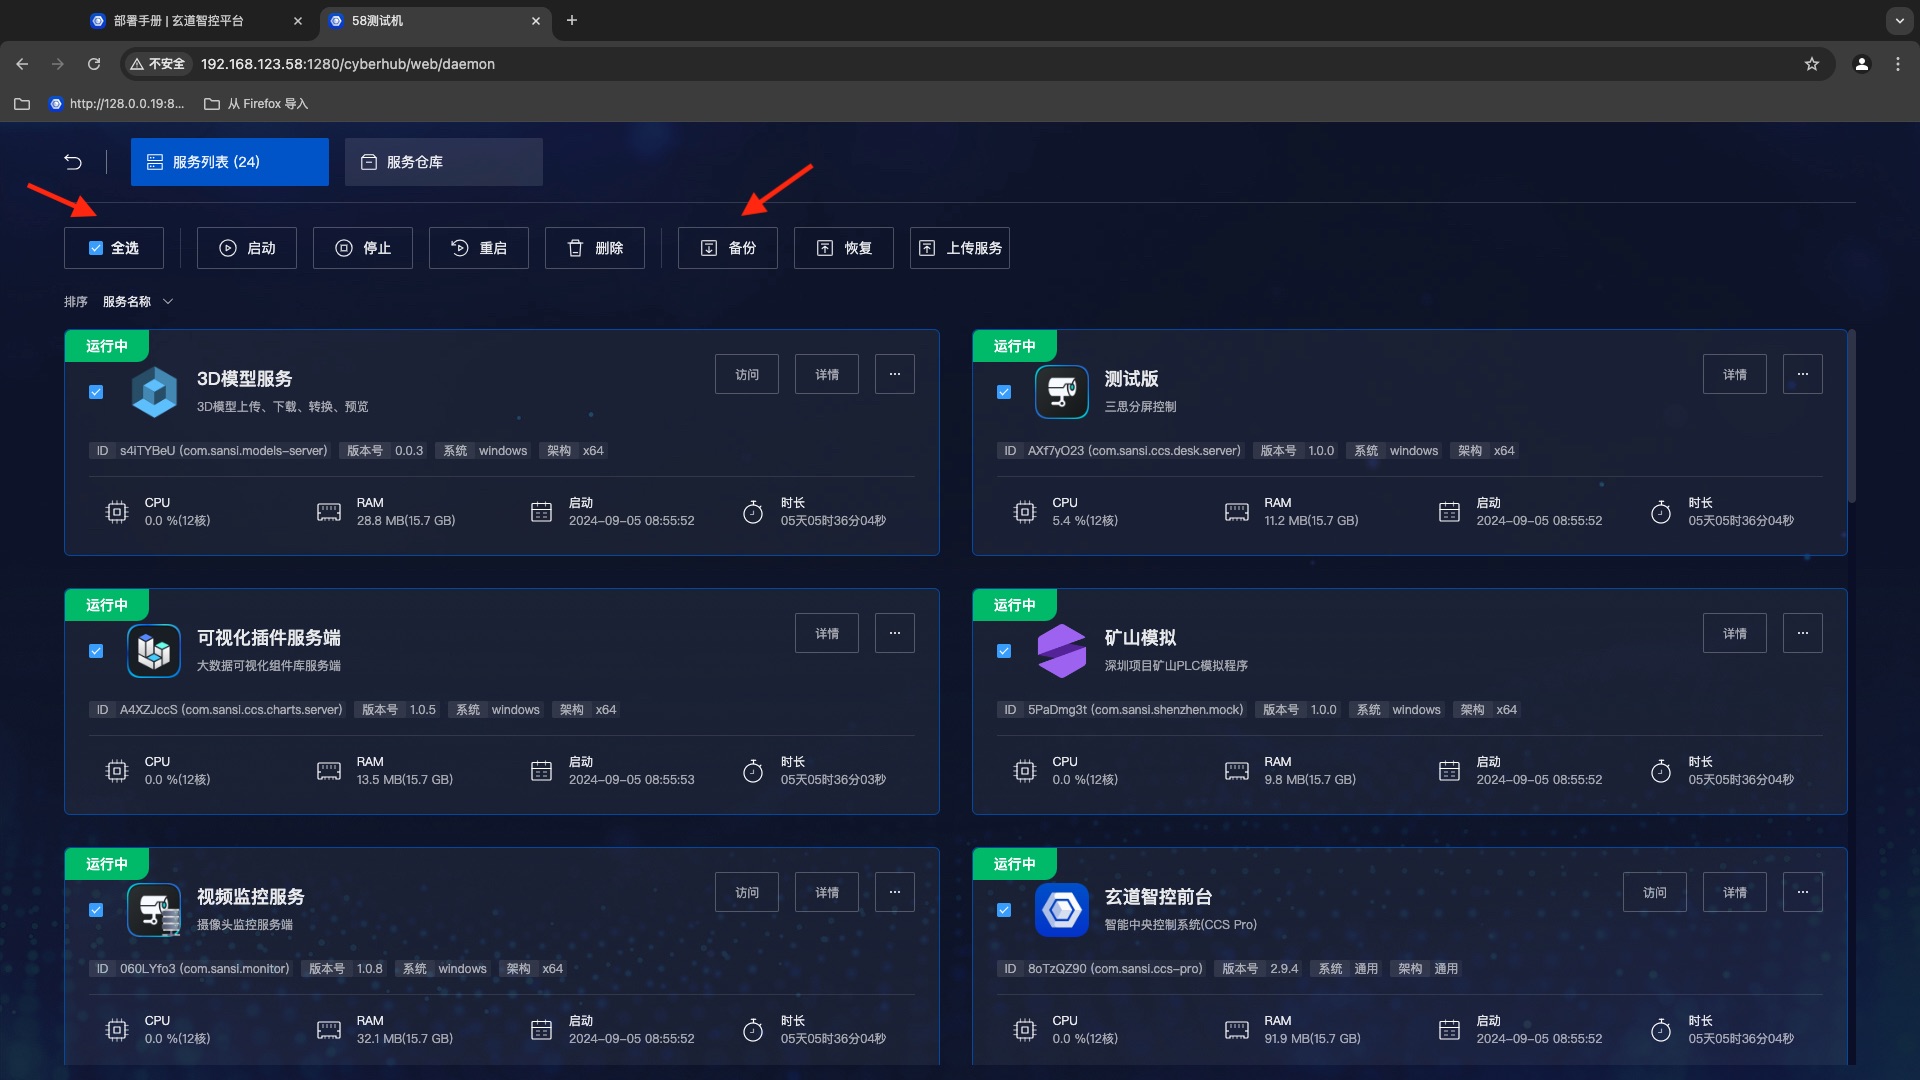
- Enter the service management page and click the select all button.
- Click backup and wait for the backup to complete.
Data Recovery
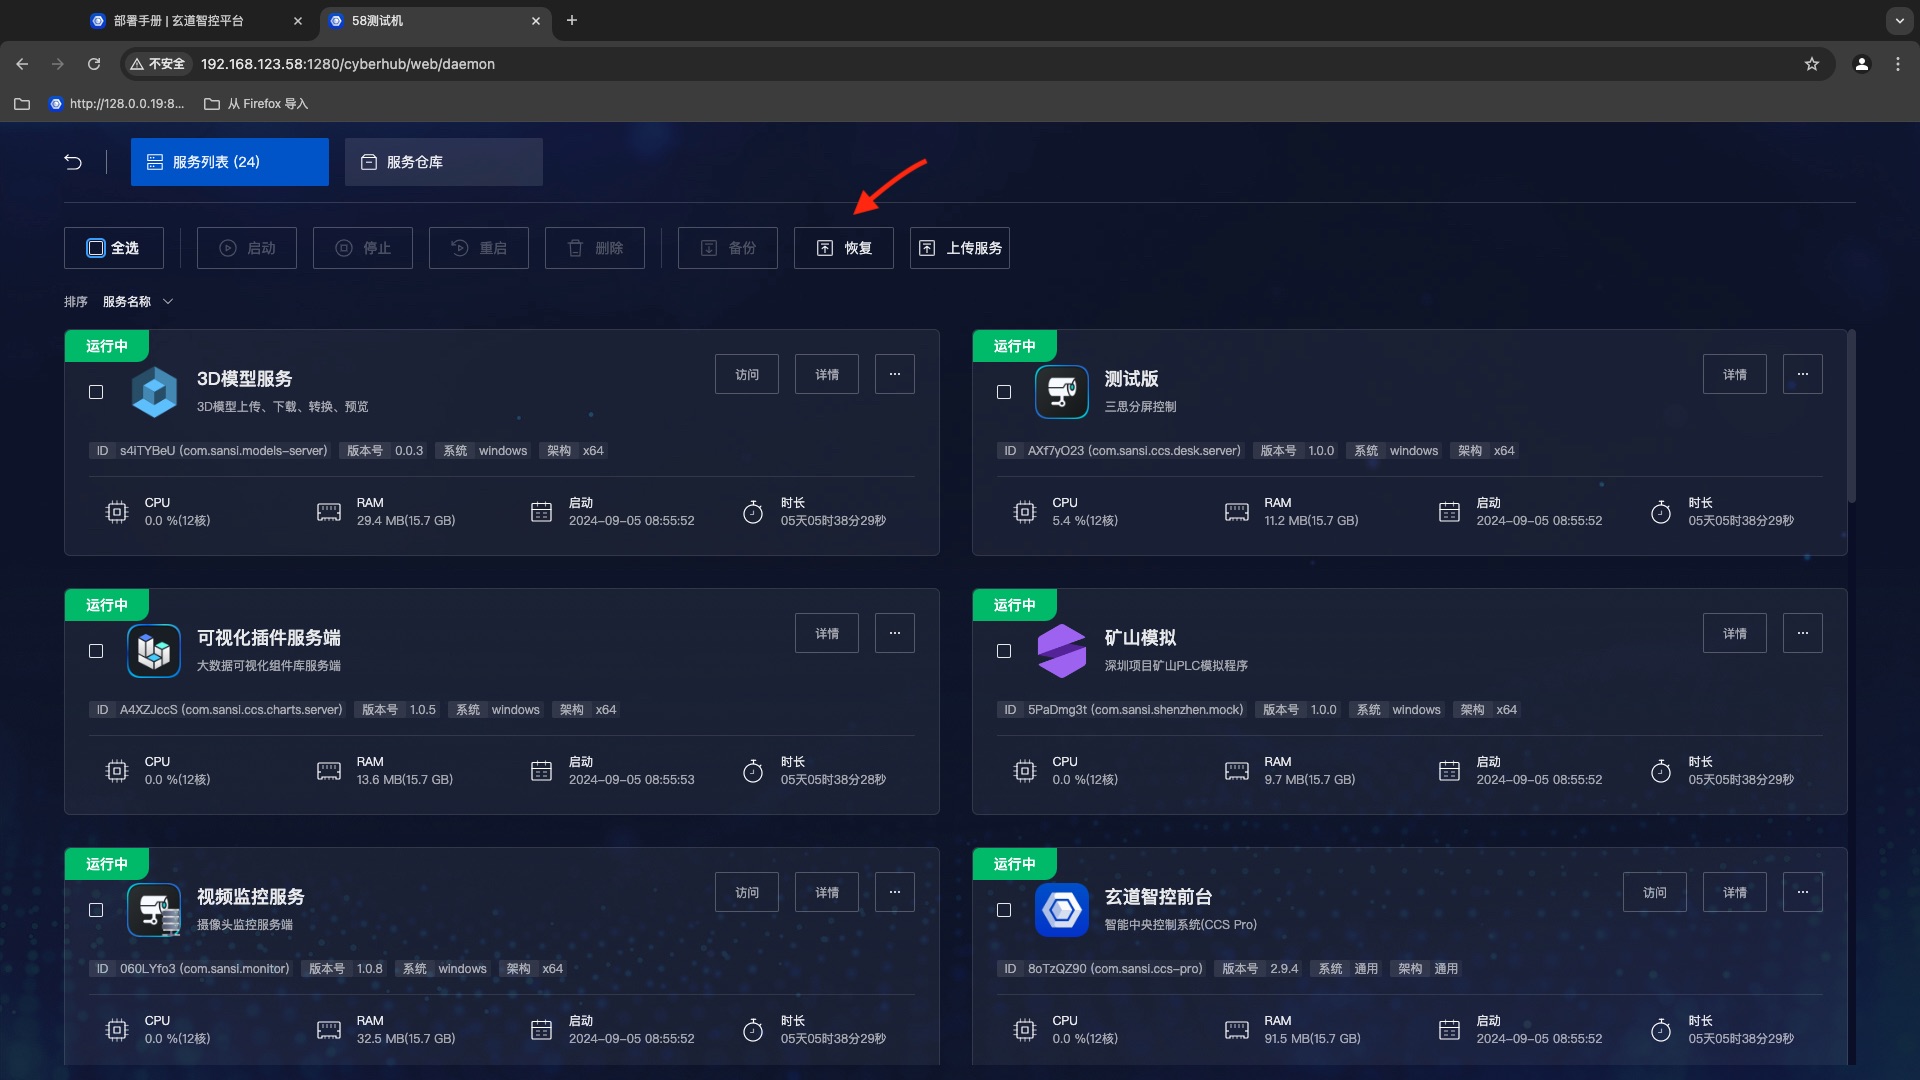
- Enter the service management page and click on the backup button.
- Upload the backup data and wait for the recovery to complete.
Notes
- Some routers do not clearly define LAN and WAN ports. When the external network is detected on one of the ports, it is defined as the WAN port. Most projects do not connect to the external network, which may lead to incorrect WAN port recognition, causing ping failures between devices connected to Wi-Fi. You will need to log in to the router's configuration page to manually specify the WAN port
- Using Chrome on a pad may cause the address bar to take up too much space. To resolve this, add the page to the desktop. If it cannot be added to the desktop, refer to the next point.
- The application may not take effect when added to the desktop on a pad. You should go to Pad Settings -> Permission Management -> Find Google Chrome -> Enable the "Send to Desktop" permission.
- If devices cannot execute corresponding commands from the control interface, check whether communication is normal by using a computer to ping the target device and verify connectivity.
- The current software only supports Chrome version 80 and above. If issues arise during operation, verify whether the version of Chrome is the latest.
- When setting automatic startup policies, be sure to check whether the startup account and username match the currently configured account.